
Creating Automatic Case Tasks Within Your Workflow
The automatic workflow tasks feature ensures that tasks are generated immediately after creating a new eviction, helping to keep your process on track.
Follow the steps below to learn how to set up automatic tasks, ensuring your workflow remains organized and no crucial steps are missed.
Note: Admin access is required.
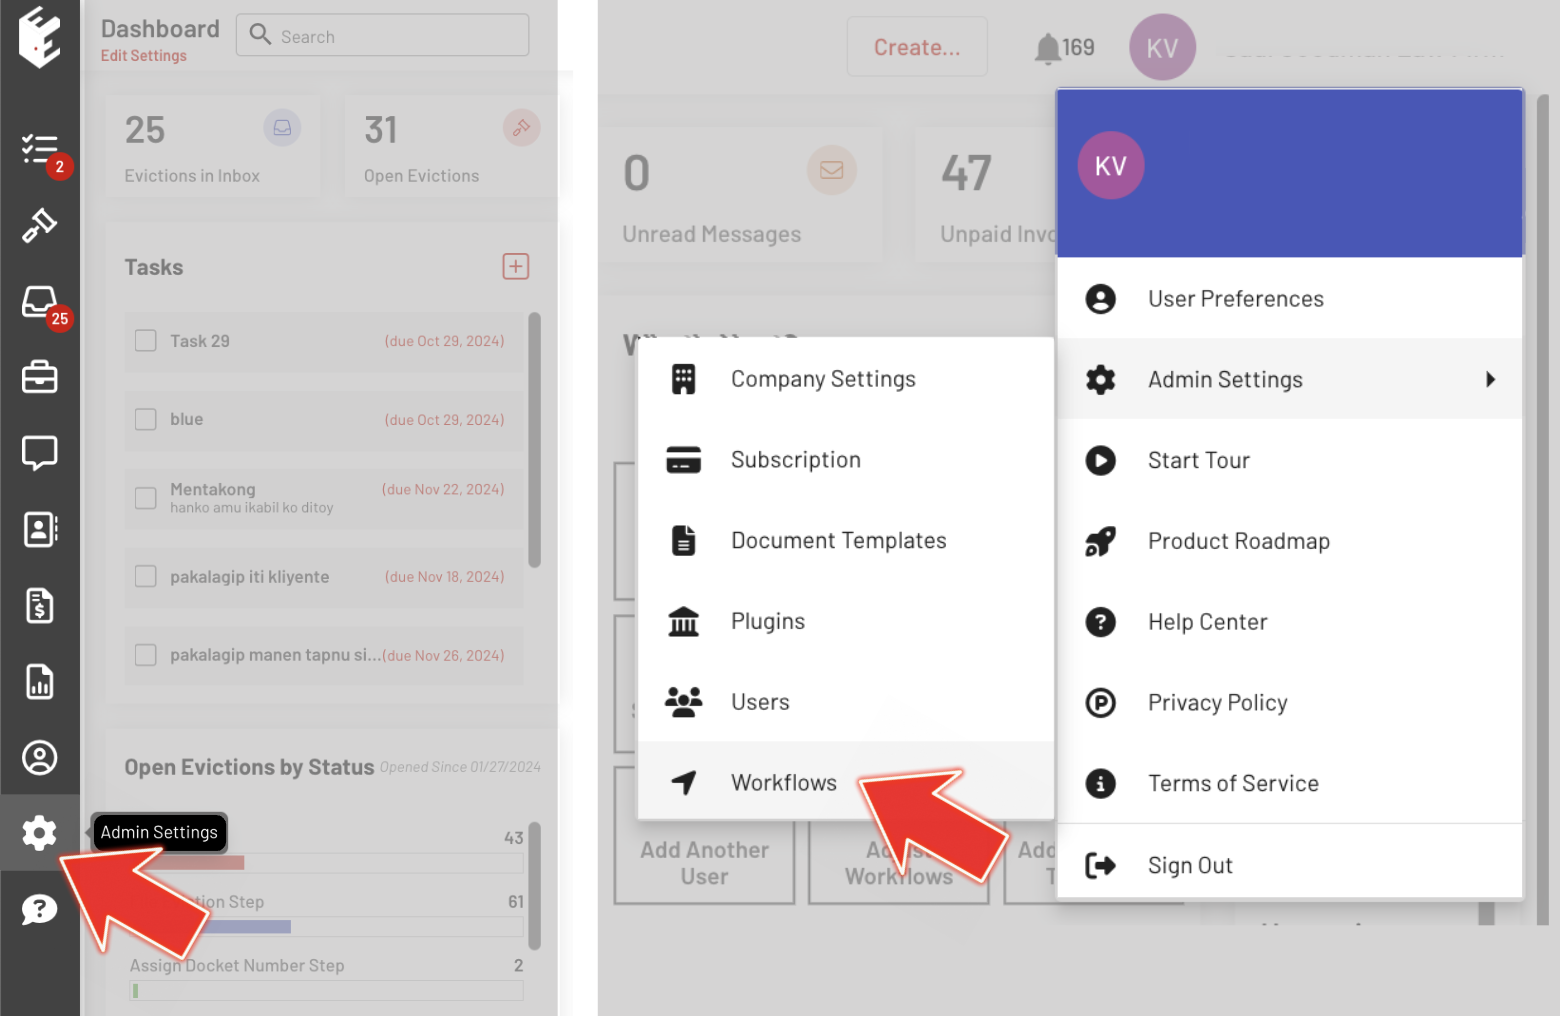
Step 1: Access Admin Settings
To get started, click the admin settings widget on the left sidebar of your EasyEviction dashboard or the User Profile Area in the upper right corner. From the menu that appears, select "Workflow" to access the Manage Workflows page.
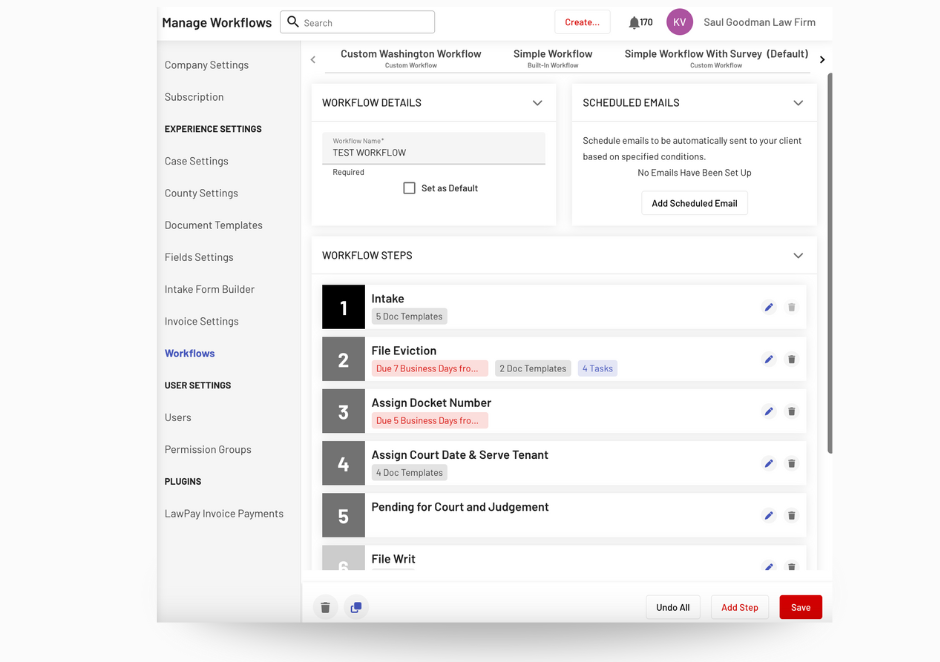
Step 2: Manage Workflows Page
On the Manage Workflows page, you'll see a list of available workflows at the top. Choose the specific workflow you want to edit by clicking on it. This will open up the workflow details for that specific process.
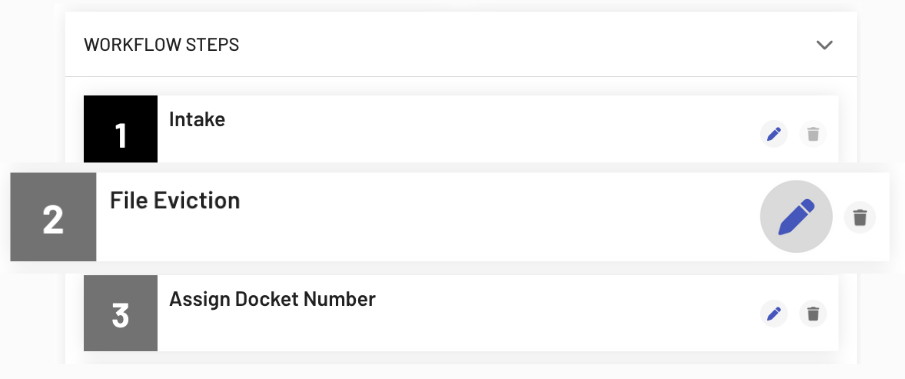
Step 3: Edit File Eviction Workflow Step
Within the workflow steps, locate the "File Eviction" step. Click the pencil icon next to this step to begin editing. This will allow you to add or modify tasks related to the eviction filing process.
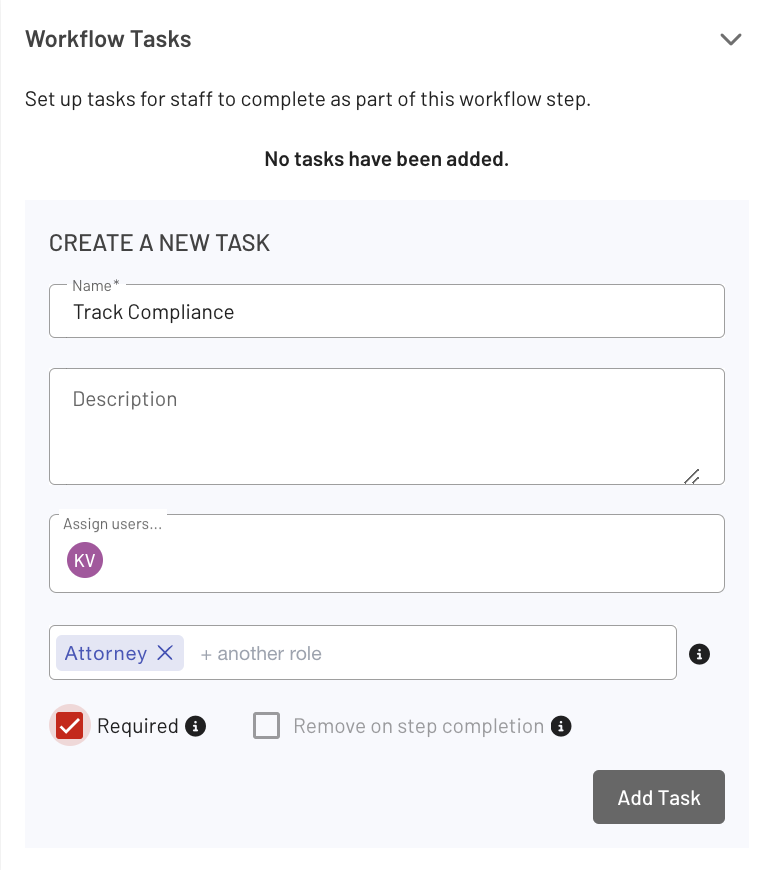
Step 4: Edit Workflow Tasks
Next, click the arrow button next to the task section to drop down the task details.
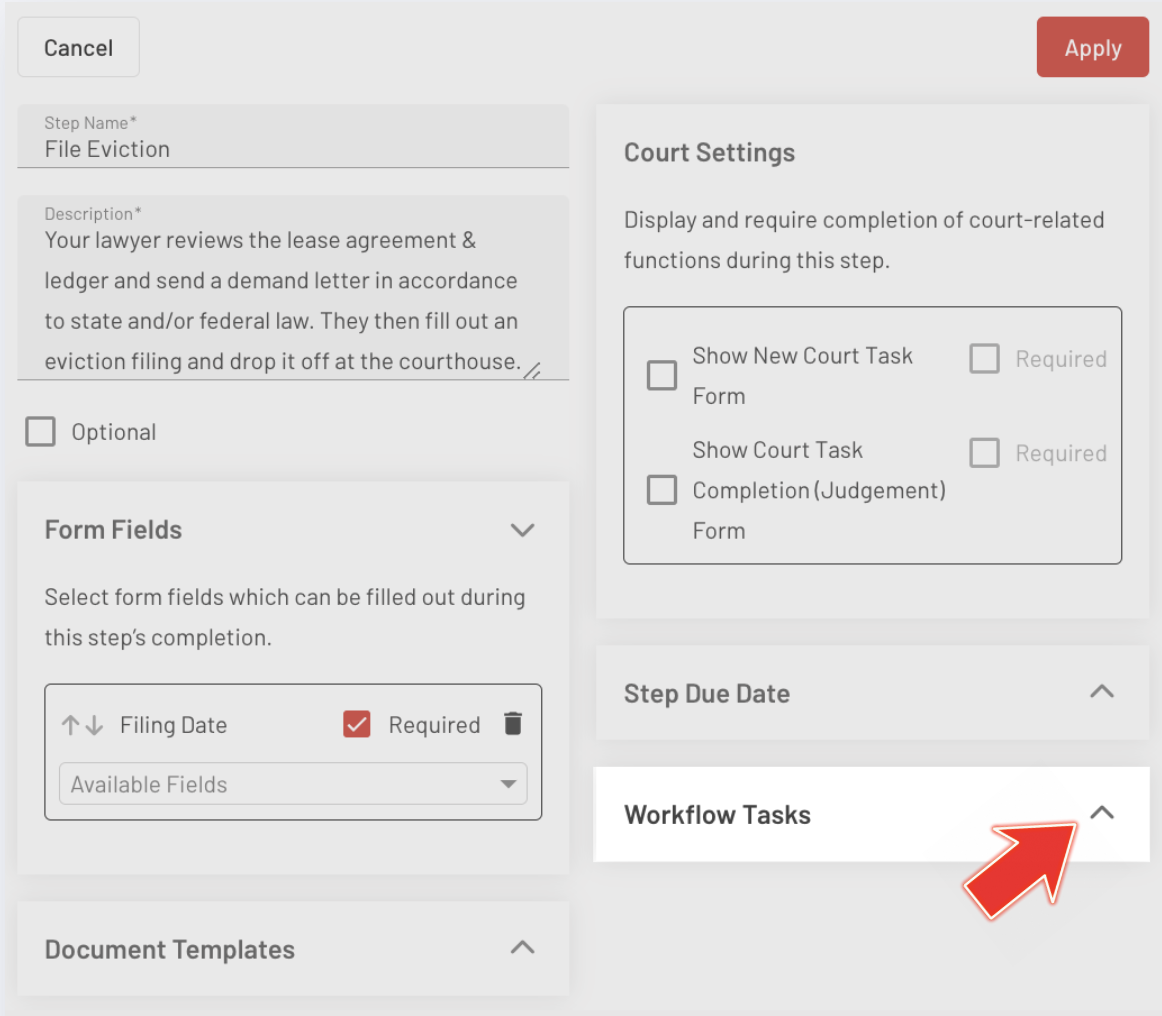
This will enable you to create a new task for this workflow step. Fill out the task details, such as the task name, description, and any other relevant information. Once you're satisfied with the task, click the "Add Task" button to add it to the workflow.
Note: When a role is assigned and more than two people in the account share the same role, all individuals with that role will be automatically be assigned as users for that specific workflow task. This can be viewed on the eviction details page in the "Update Status" section.
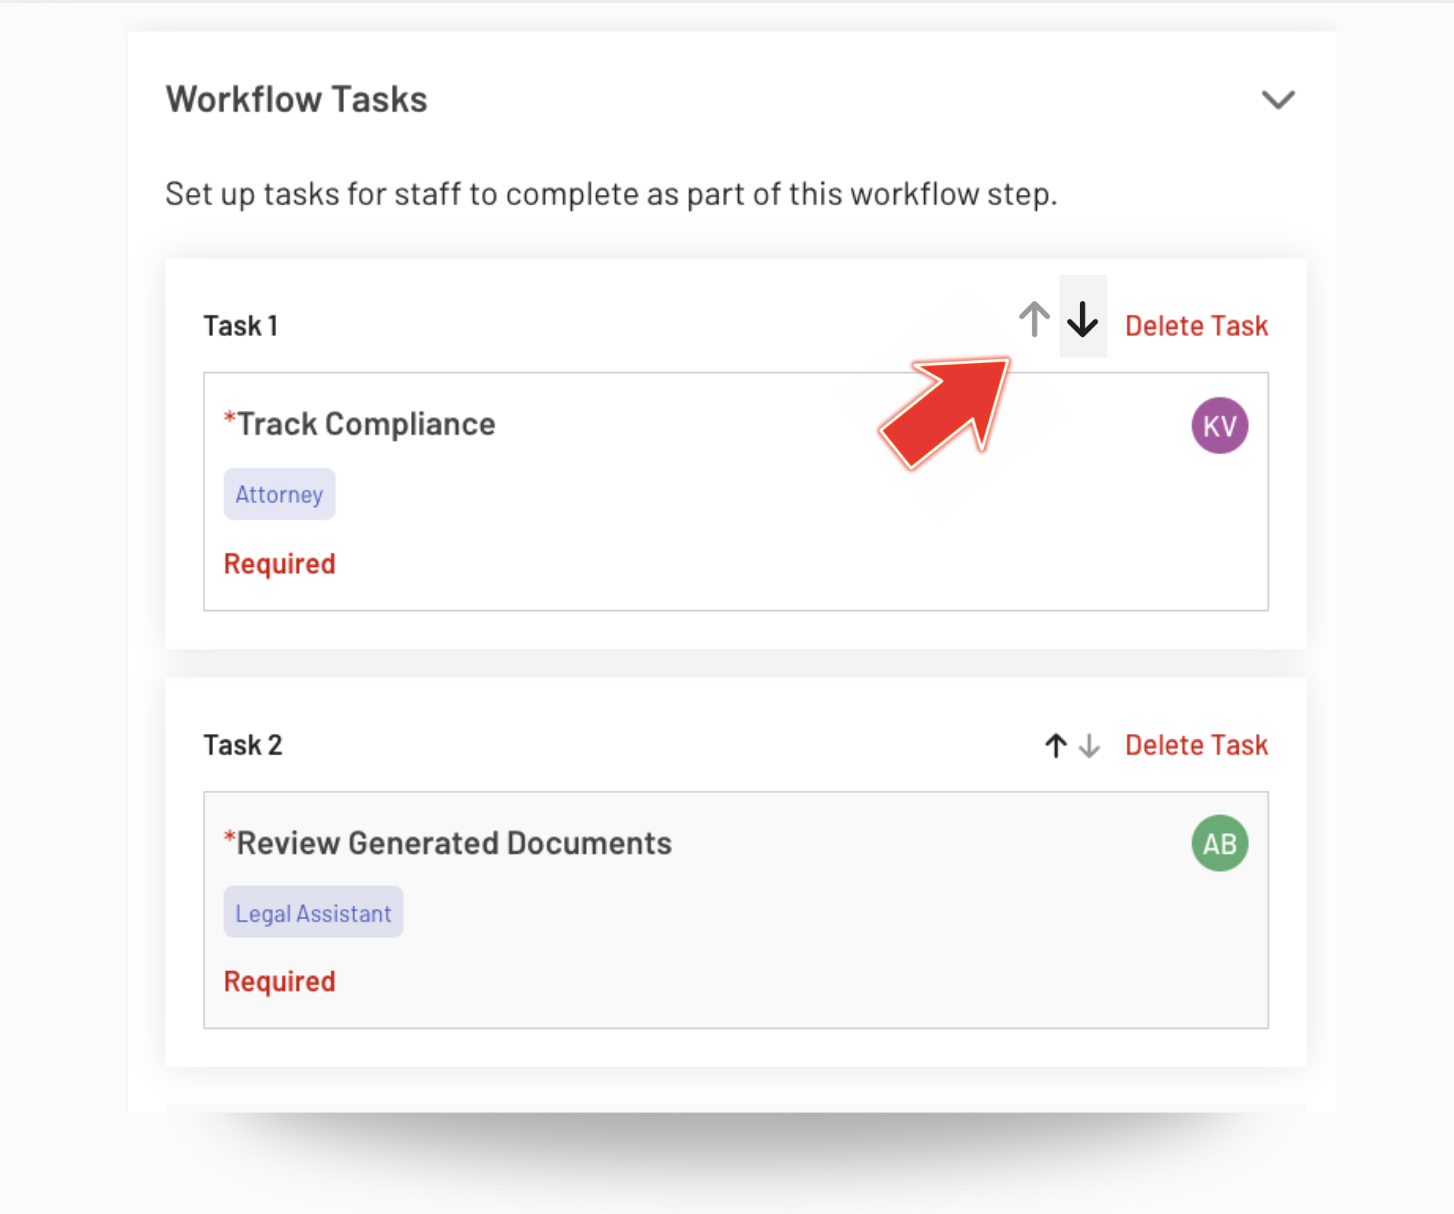
You can also rearrange the order of tasks by clicking on the up/down arrow next to each task. This lets you organize tasks in the sequence that best fits your process.
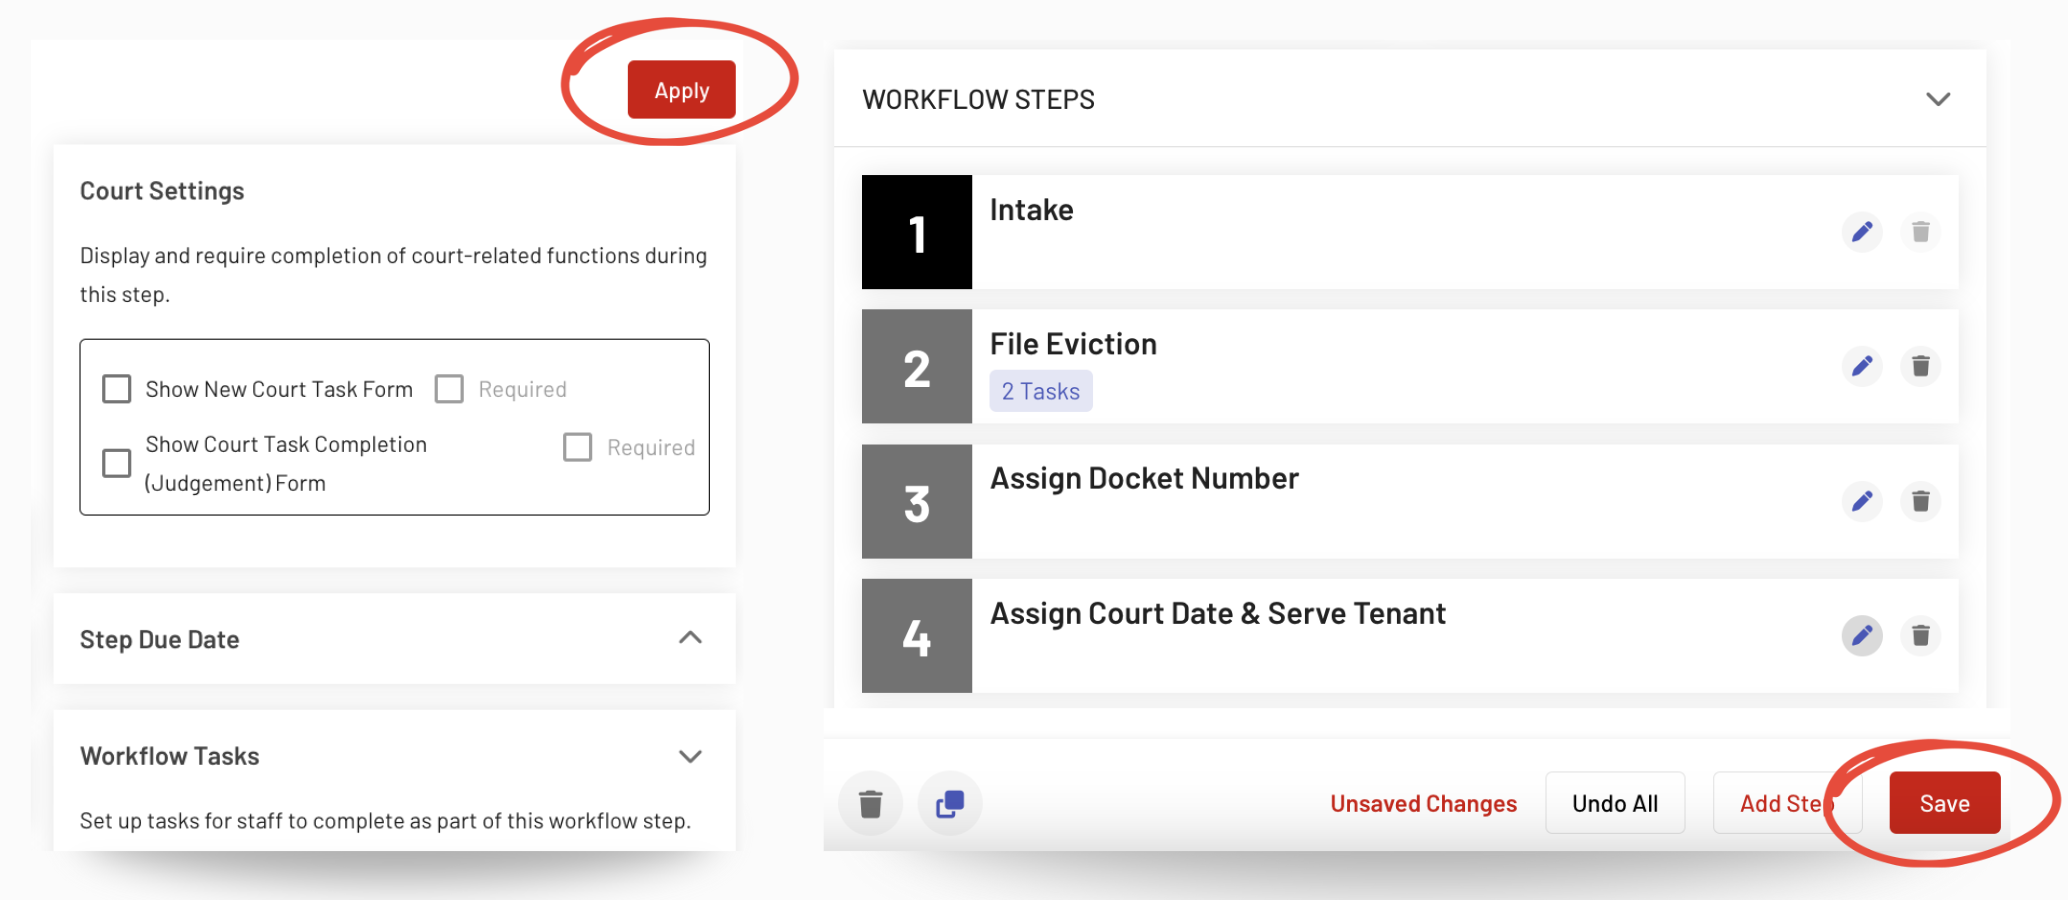
Be sure to click the red "Apply" button in the upper right corner to save any changes made within the workflow editor. After making all the necessary adjustments, click the "Save" button on the Manage Workflows page to preserve your changes.
Automatic Workflow Task Feature:
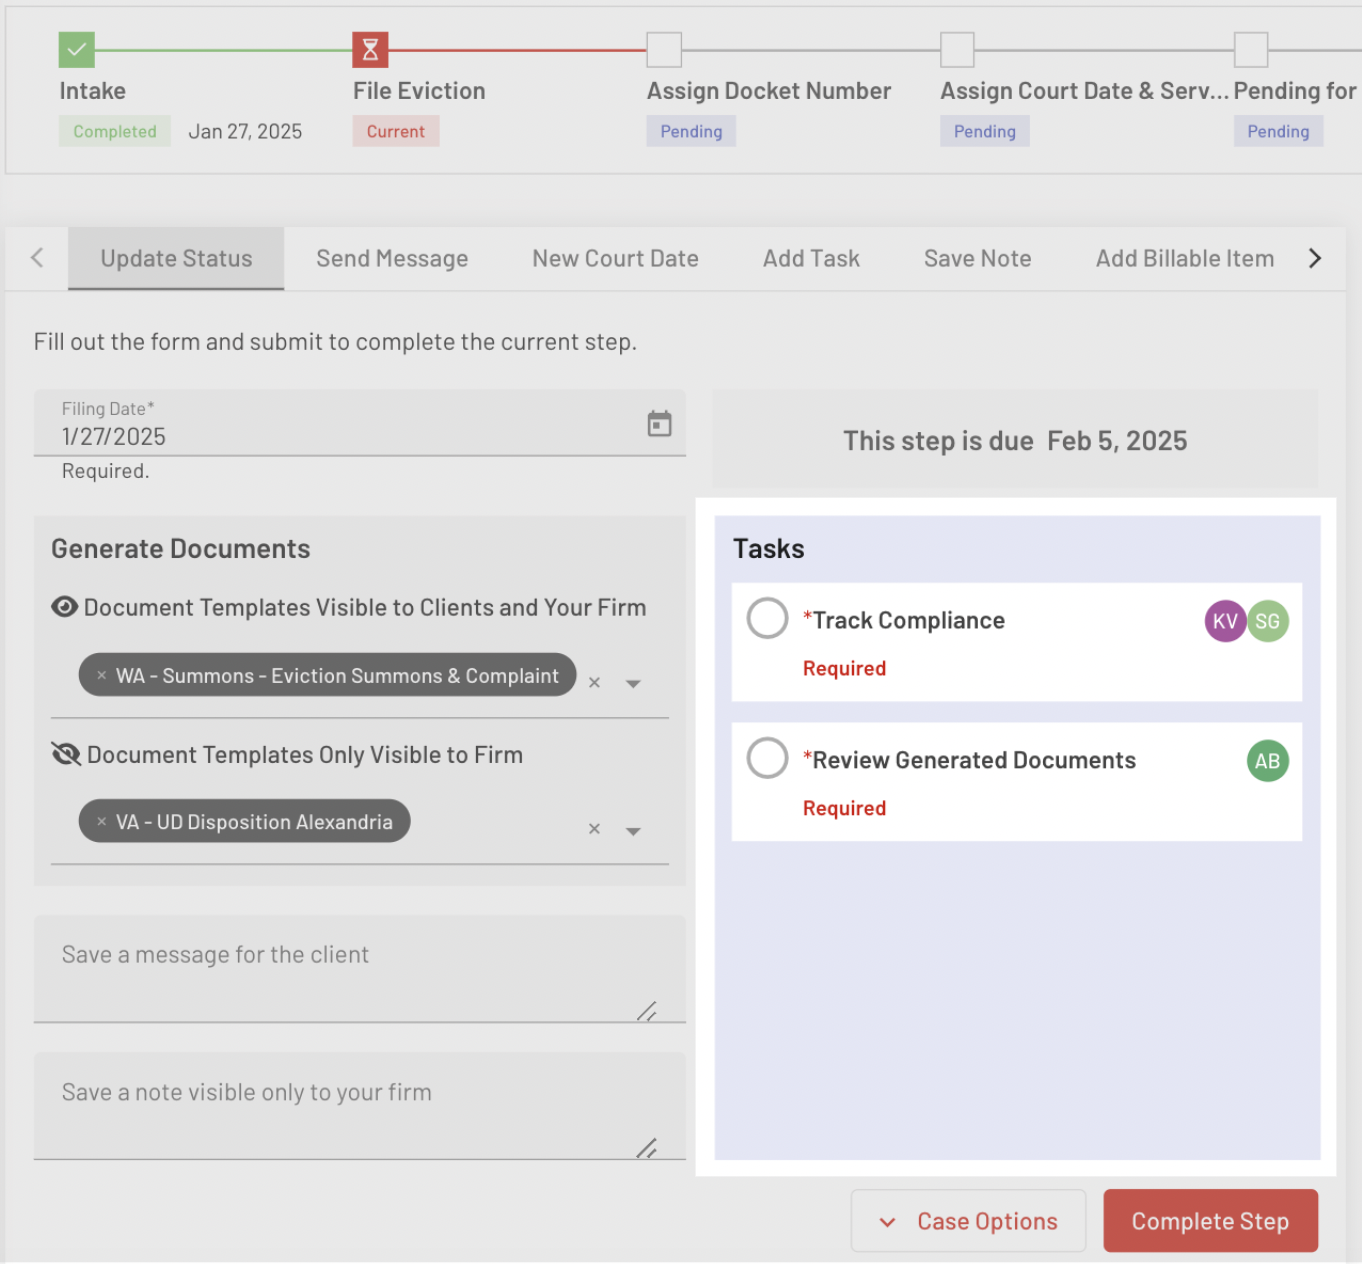
Once your automatic workflow task is created, it will automatically appear on the EasyEviction case details page under the "Update Status" section once the eviction process has been initiated. This ensures that all team members involved in the eviction are notified of the task and can follow through accordingly.
If you need to make any adjustments to the task after it’s been created—such as adding a due date, editing the task name, or changing the assigned users—you can easily edit the task by clicking on it. This will open the "Edit Task" form, where you can make the necessary changes.
By creating automatic tasks in your workflow, you can ensure a more organized and efficient eviction process, helping to reduce the risk of missing critical steps and deadlines.
If you have any questions, don't hesitate to contact our support team.