
How to Customize a Workflow
Tailor your Workflow within your EasyEviction account to suit your specific needs by customizing it to remove unnecessary details and include only the important information and steps, which will make the eviction process more efficient. Simply follow the steps below to get started.
Note: You must first be an admin to access the admin settings.
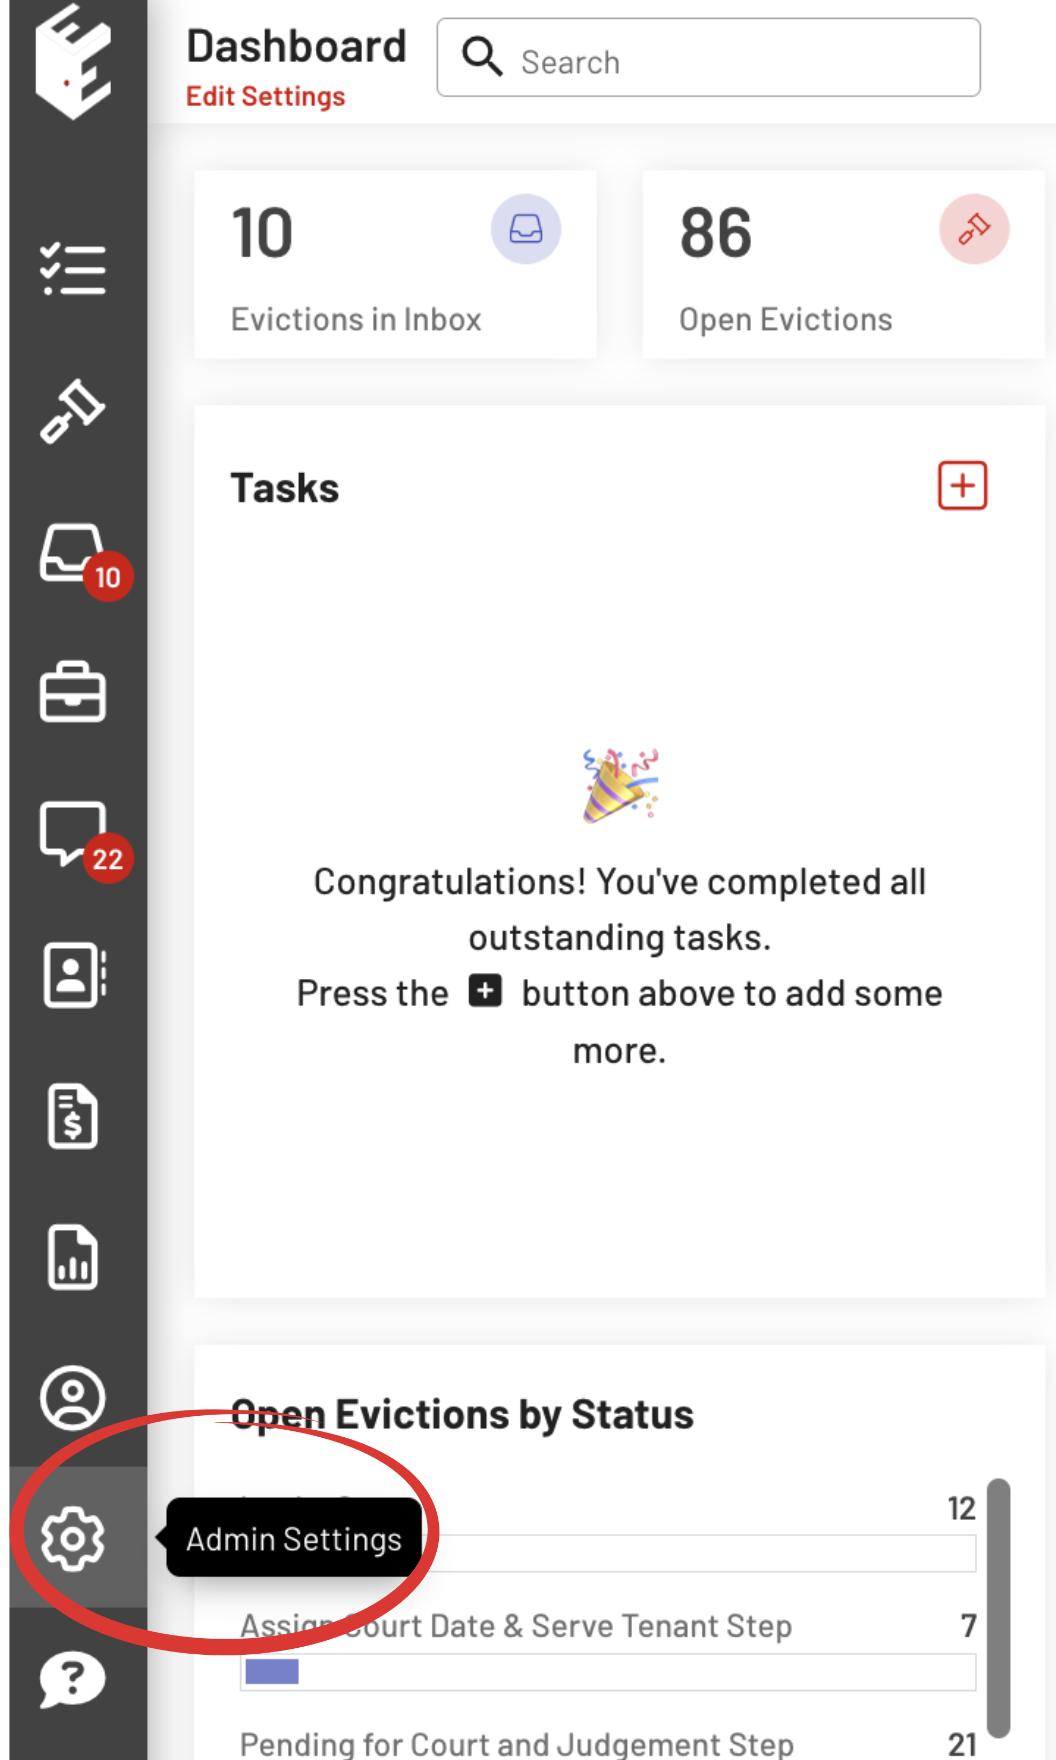
Step 1: Click the "Admin Settings" button
Go to your EasyEviction dashboard and click the gear icon or "Admin Settings" button.
Step 2: Select "Workflows"
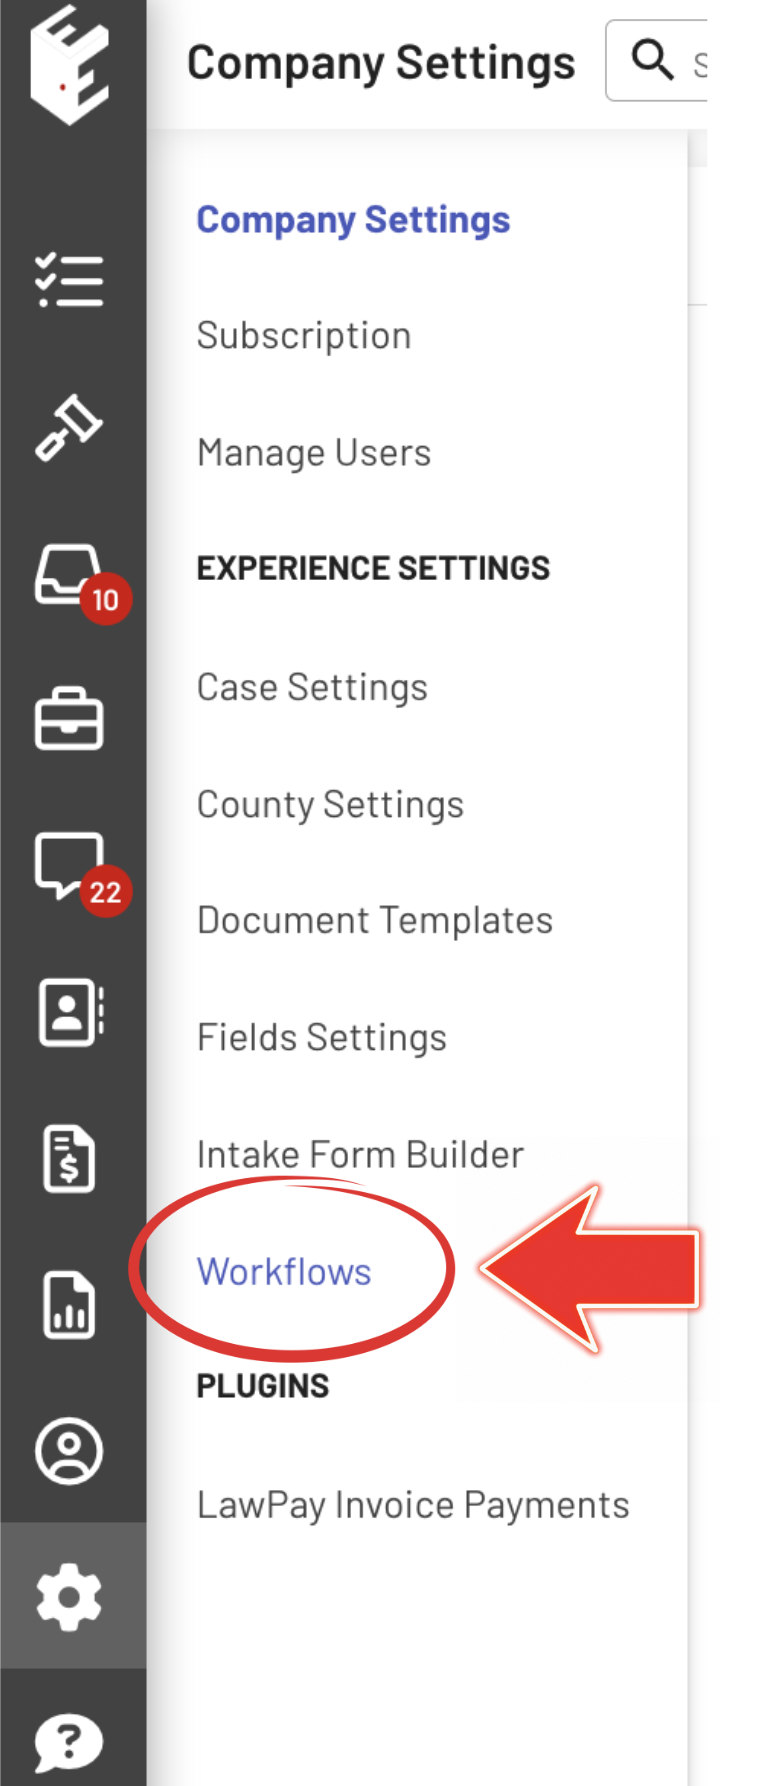
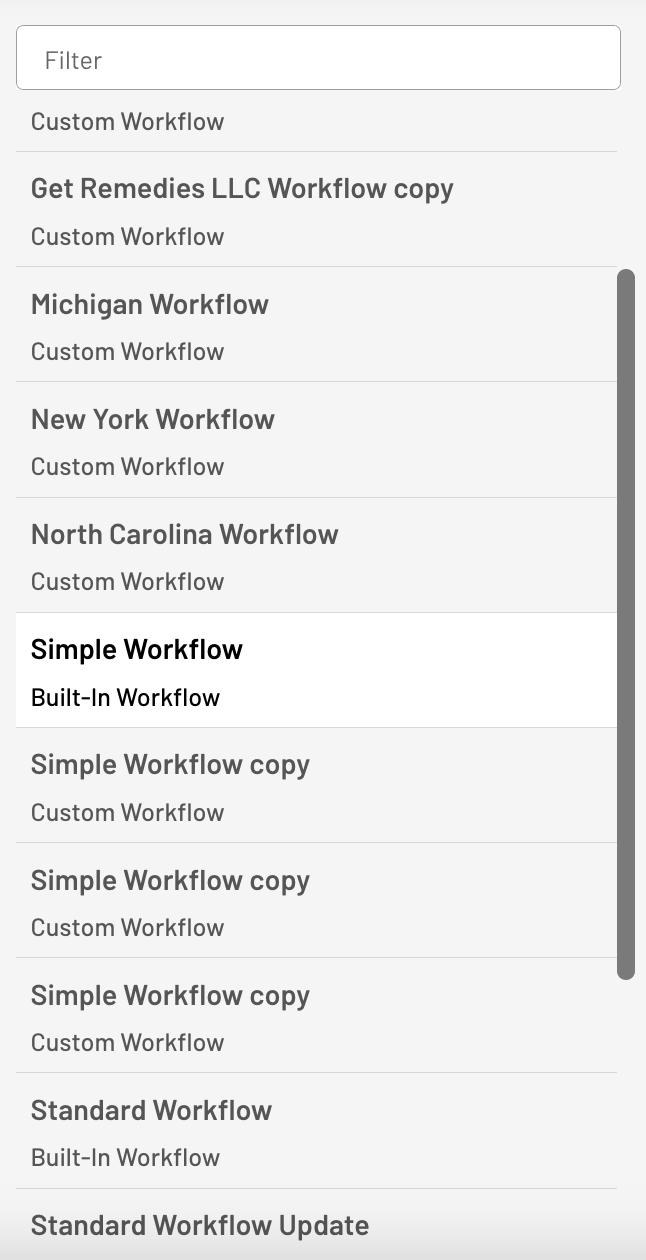
Step 3: Select a workflow
When you click a specific workflow, you can see a preview of the workflow's details and steps.
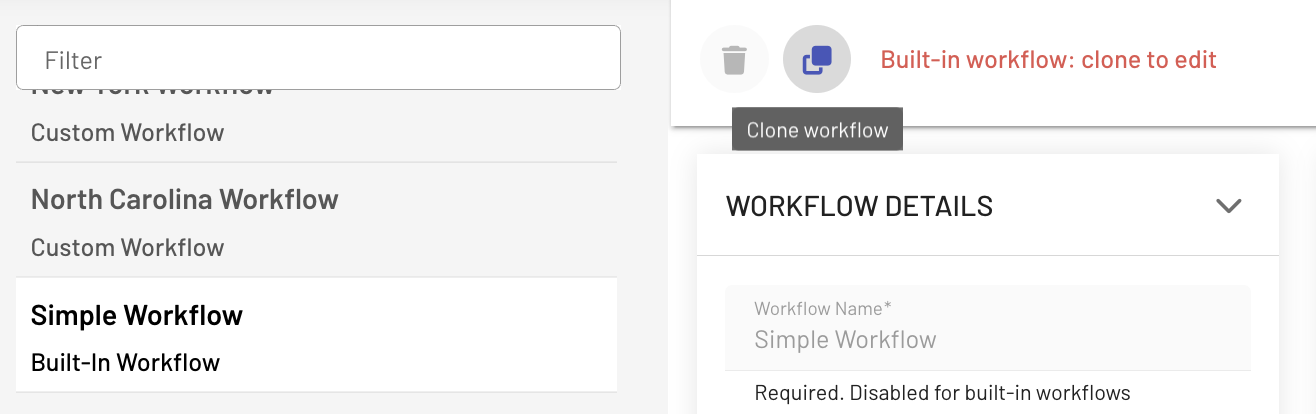
Step 4: Duplicate a workflow to customize it
Click the "Clone workflow" button at the top of the page to start duplicating.
Step 5: Edit the cloned Workflow
After cloning a workflow, you can start editing the duplicate by clicking its copy.
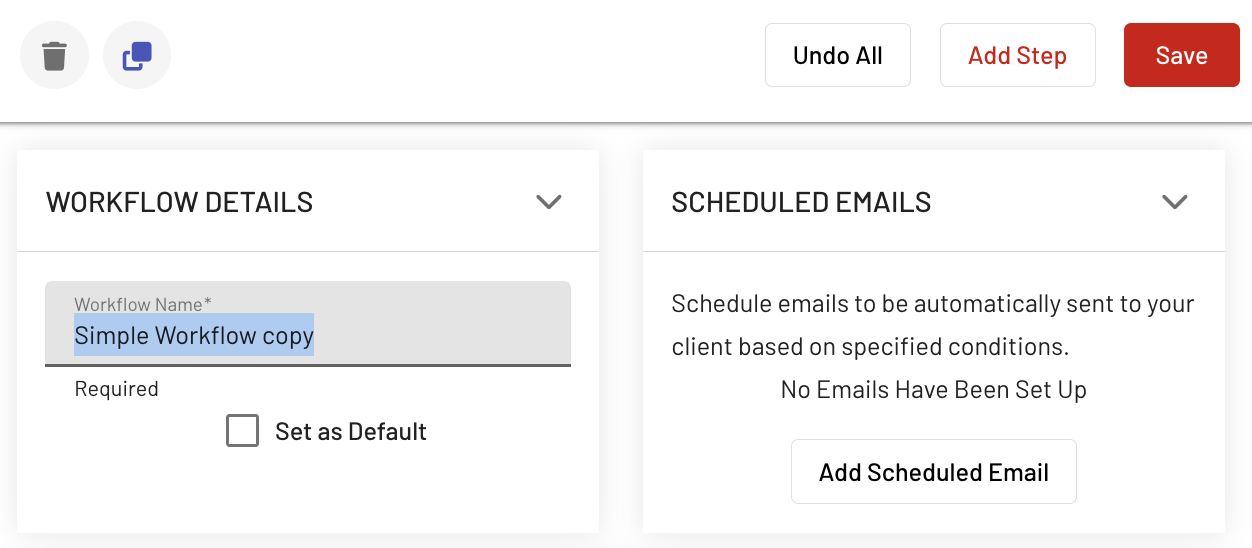
Rename the workflow and edit the Scheduled Emails.
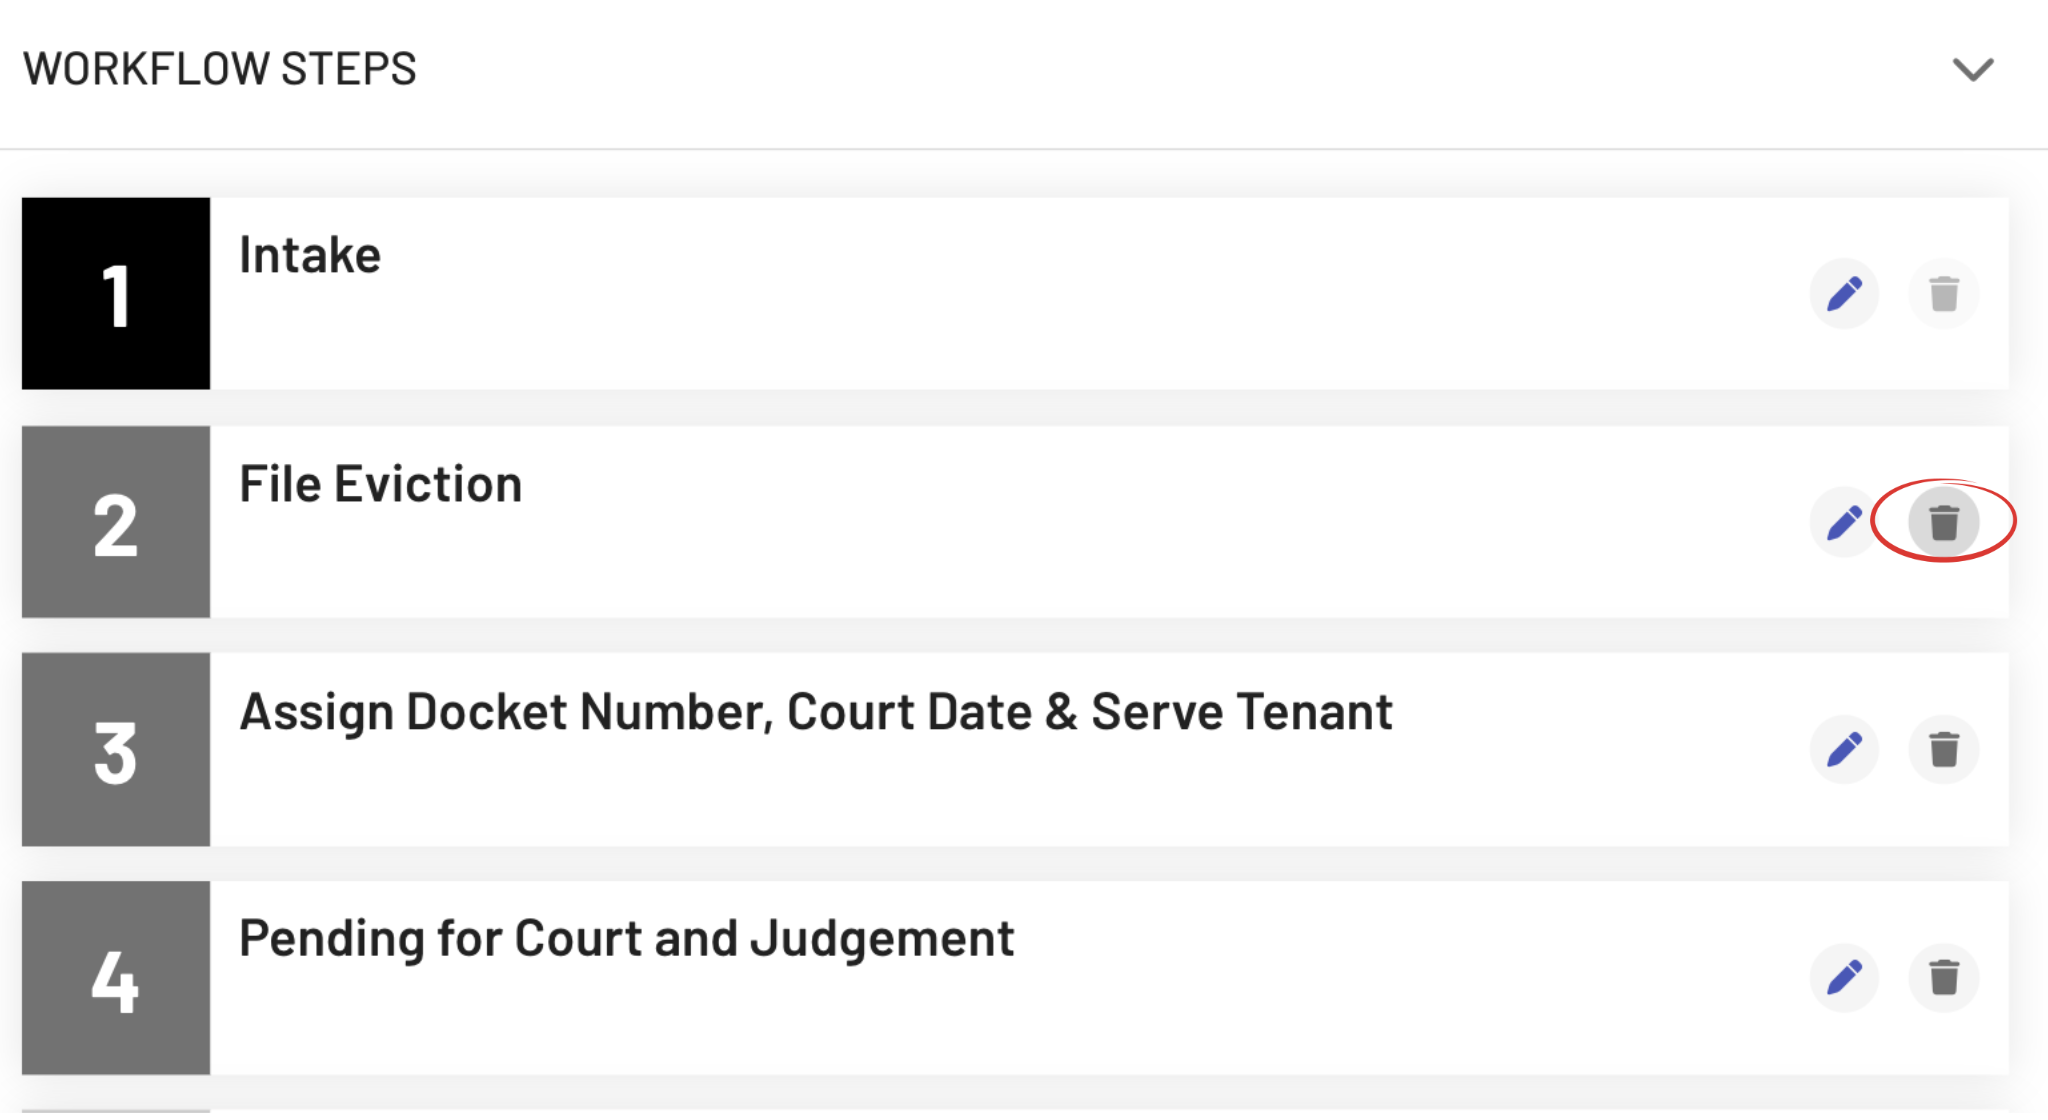
Step 6: Modify the Workflow Steps
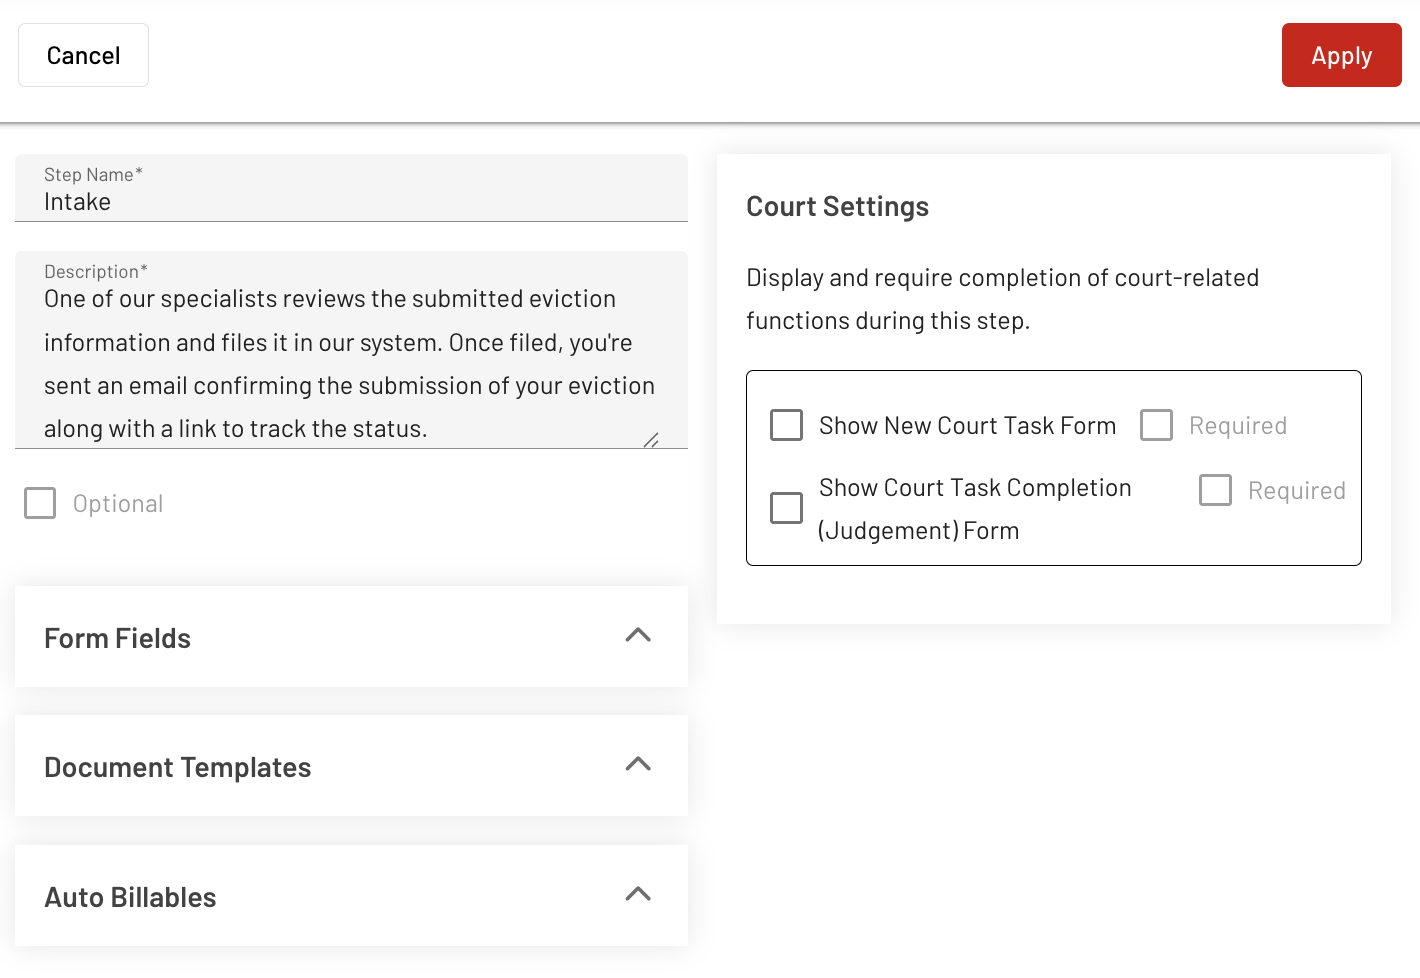
To Edit the Workflow Steps, just click the "pencil icon".
After editing all the details, click the "Apply Changes" button.
To Remove a Workflow Step, click the trashbin icon to Delete the selected Step.
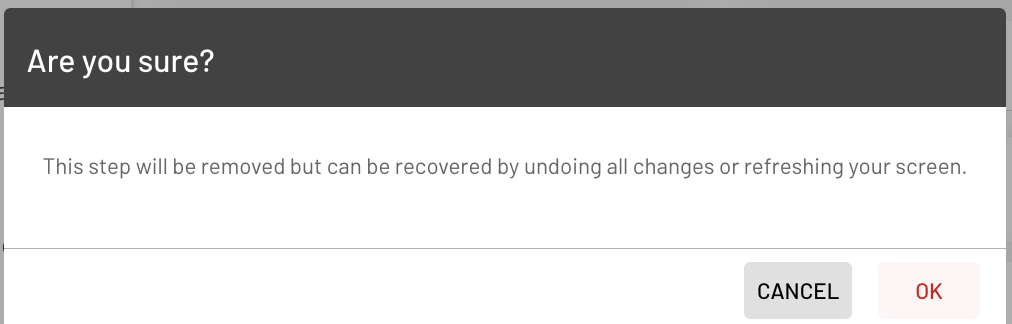
A confirmation will appear after clicking the delete button.
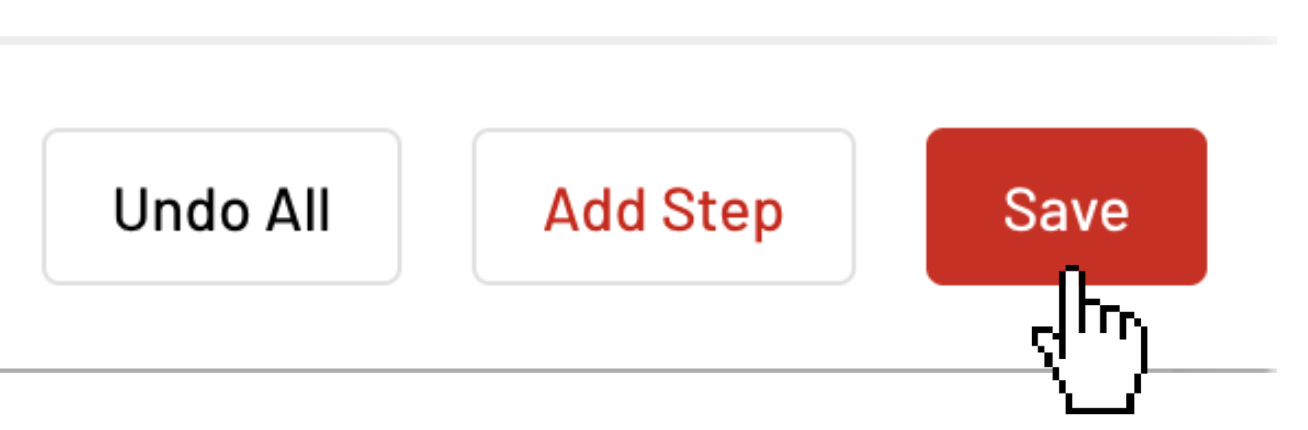
To Add a Workflow Step, click the "Add Step" button at the upper right corner of the page.

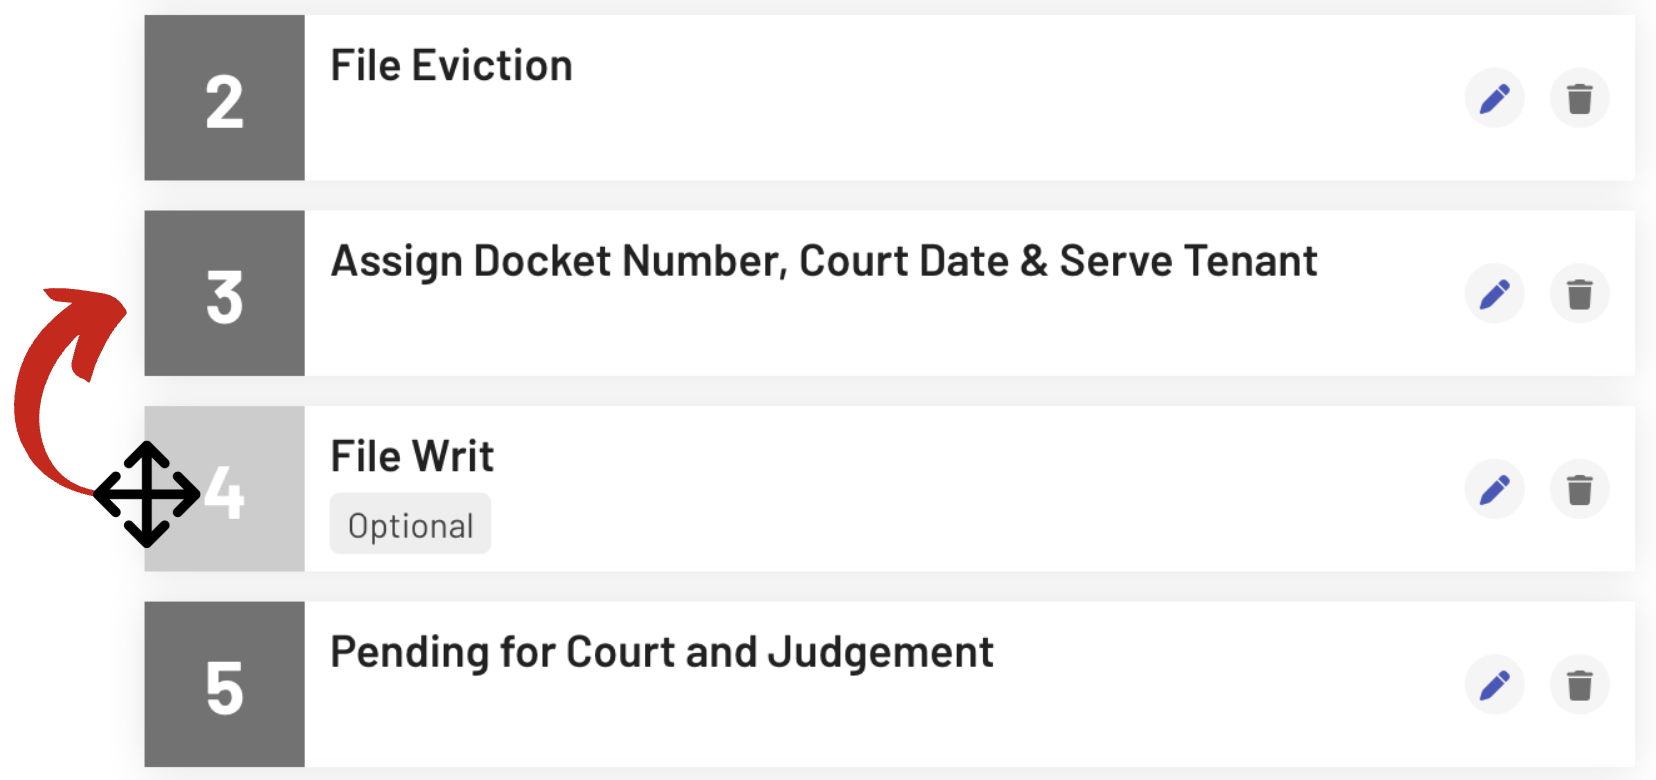
To Reorganize the Steps, click the step and drag it to the desired order.
Step 6: Finalize and Save
If you are satisfied with your customized Workflow, then click the "Save" button to apply all the changes made.
And that's it! You can now use your customized Workflow to make the Eviction process more efficient.
If you need further help or have any inquiries, please contact our support team at your convenience.